Defx, A Dark Powered File Explorer
Posted on Saturday, 22 February 2020
6 minutes to read
Introduction
Hi everyone! This time I will talk about a (Neo)vim plugin called Defx. I've been looking for an alternative to NERDTree for quite a while now. I came across this plugin from a telegram channel called "Vim Indonesia". Since I have no project that I'm currently working on, why don't I give it a shot?
Installation
The installation is pretty simple. You can add this plugin just like any other plugin from your plugin manager. I'm using vim-plug as my plugin manager. To add a plugin, I would simply add this into my plugin list.
if has('nvim')
  Plug 'Shougo/defx.nvim', { 'do': ':UpdateRemotePlugins' }
else
  Plug 'Shougo/defx.nvim'
  Plug 'roxma/nvim-yarp'
  Plug 'roxma/vim-hug-neovim-rpc'
endif
After doing that, I source my init.vim using :so ~/.config/nvim/init.vim and then just run :PlugInstall to install it. Make sure your (Neo)vim supports Python 3.
Configuration
Keybindings
To toggle Defx, you'd run :Defx. To make it efficient, let's assign that to a keystroke. To do that, I add this into my config
nnoremap <C-n> :DefxFinally, we can just simply press ctrl+n to toggle it. Awesome!
You'll notice that by default it doesn't handle keypress to open a directory, open a file, add a file, etc like NERDTree. You have to add that by yourself. Thankfully, there is this blog that helped me making those keybindings. What you need to do is to add this long lines of vimscript to your config file.
autocmd FileType defx call s:defx_my_settings()
function! s:defx_my_settings() abort
  " Define mappings
  nnoremap <silent><buffer><expr> <CR> defx#do_action('drop')
  nnoremap <silent><buffer><expr> c
  \ defx#do_action('copy')
  nnoremap <silent><buffer><expr> m
  \ defx#do_action('move')
  nnoremap <silent><buffer><expr> p
  \ defx#do_action('paste')
  nnoremap <silent><buffer><expr> l
  \ defx#do_action('open')
  nnoremap <silent><buffer><expr> E
  \ defx#do_action('open', 'vsplit')
  nnoremap <silent><buffer><expr> P
  \ defx#do_action('open', 'pedit')
  nnoremap <silent><buffer><expr> o
  \ defx#do_action('open_or_close_tree')
  nnoremap <silent><buffer><expr> K
  \ defx#do_action('new_directory')
  nnoremap <silent><buffer><expr> N
  \ defx#do_action('new_file')
  nnoremap <silent><buffer><expr> M
  \ defx#do_action('new_multiple_files')
  nnoremap <silent><buffer><expr> C
  \ defx#do_action('toggle_columns',
  \                'mark:indent:icon:filename:type:size:time')
  nnoremap <silent><buffer><expr> S
  \ defx#do_action('toggle_sort', 'time')
  nnoremap <silent><buffer><expr> d
  \ defx#do_action('remove')
  nnoremap <silent><buffer><expr> r
  \ defx#do_action('rename')
  nnoremap <silent><buffer><expr> !
  \ defx#do_action('execute_command')
  nnoremap <silent><buffer><expr> x
  \ defx#do_action('execute_system')
  nnoremap <silent><buffer><expr> yy
  \ defx#do_action('yank_path')
  nnoremap <silent><buffer><expr> .
  \ defx#do_action('toggle_ignored_files')
  nnoremap <silent><buffer><expr> ;
  \ defx#do_action('repeat')
  nnoremap <silent><buffer><expr> h
  \ defx#do_action('cd', ['..'])
  nnoremap <silent><buffer><expr> ~
  \ defx#do_action('cd')
  nnoremap <silent><buffer><expr> q
  \ defx#do_action('quit')
  nnoremap <silent><buffer><expr> <Space>
  \ defx#do_action('toggle_select') . 'j'
  nnoremap <silent><buffer><expr> *
  \ defx#do_action('toggle_select_all')
  nnoremap <silent><buffer><expr> j
  \ line('.') == line('$') ? 'gg' : 'j'
  nnoremap <silent><buffer><expr> k
  \ line('.') == 1 ? 'G' : 'k'
  nnoremap <silent><buffer><expr> <C-l>
  \ defx#do_action('redraw')
  nnoremap <silent><buffer><expr> <C-g>
  \ defx#do_action('print')
  nnoremap <silent><buffer><expr> cd
  \ defx#do_action('change_vim_cwd')
endfunction
As usual, don't get intimidated by the long block of code. It's just a bunch of keybinds. You can customize it however you want.
Using split window
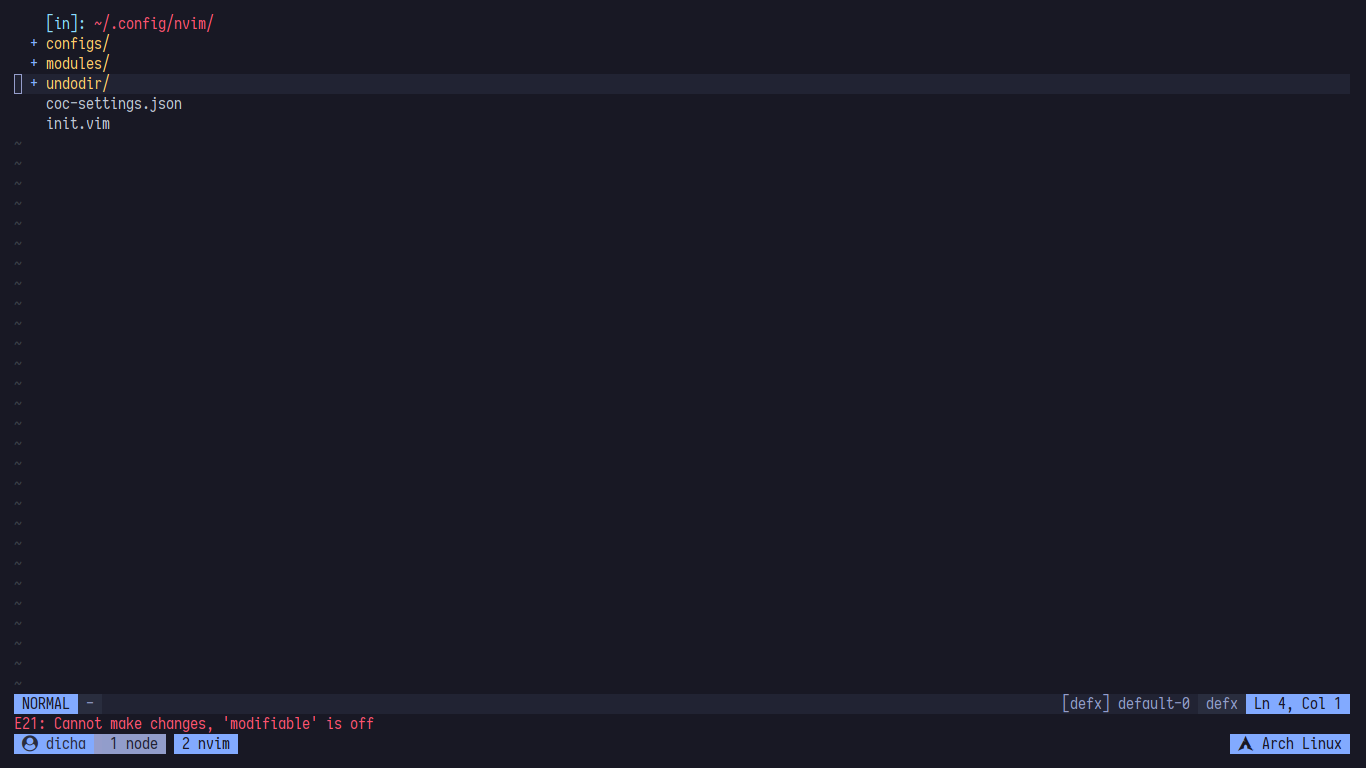
As you can see, Defx looks way more plain than NERDTree. Let's change that! First thing first, we make it split instead of fullscreen and put it to the left of our screen. To do that, add this to your config.
" Set appearance
call defx#custom#option('_', {
      \ 'winwidth': 30,
      \ 'split': 'vertical',
      \ 'direction': 'topleft',
      \ 'show_ignored_files': 0,
      \ 'buffer_name': 'defxplorer',
      \ 'toggle': 1,
      \ 'resume': 1,
      \ })
Let me quickly explain to you what does what.
winwidth : It's pretty straight forward. This field sets the minimum width for the Defx window width.
split : This field sets the mode of the split. You can fill this with horizontal or vertical. In our case, it's vertical.
direction : This field sets the position of the split. In our case, it's topleft which will make it split to the left. The other possible values are available through :h defx.
show_ignored_files : This option will decide whether it will display the hidden files or not. In our case, it's not getting displayed.
buffer_name : Basically, it sets the buffer name for defx window.
toggle : This field makes Defx window toggleable. I recommend you to fill this field with 1.
resume : This field makes Defx resume-able. It saves the state of where your cursor is so you don't have to navigate from the root of your project directory again after you close Defx and open it again.
All right, let's see what we've got so far.

It looks ok to me, but not quite yet. Let's take it even further by adding some icons to make it eye candy. This next step is optional. If you don't want any icon, you can skip it.
Adding icons
You know how file explorer in most text editor right? They have an icon that indicates whether it's a folder or a file. Let's replicate that in our case.
I use a plugin called defx-icons. As the name says, it will add some fancy icons to our file explorer. The installation is the same as Defx installation. Add this line to your config.
Plug 'kristijanhusak/defx-icons'Make sure to source your new config and do :PlugInstall after that. Make sure your terminal is using a patched font which you can get from here so the icons will be displayed correctly. The installation process is finished, let's configure it now! It's simple, just add this block of code into your config.
" Set appearance
call defx#custom#option('_', {
      \ 'winwidth': 30,
      \ 'split': 'vertical',
      \ 'direction': 'topleft',
      \ 'show_ignored_files': 0,
      \ 'buffer_name': 'defxplorer',
      \ 'toggle': 1,
      \ 'columns': 'icons:filename',
      \ 'resume': 1,
      \ })
As you can see, I added the columns field to the custom option function. It tells Defx to display the icons from our previous plugin. Now, I want to add those arrow symbol that indicates a directory. Let's add that to our config.
call defx#custom#column('icon', {
      \ 'directory_icon': '▸',
      \ 'opened_icon': '▾',
      \ })
This block of code creates a new column for the arrow icon. Let's add that to our custom option function.
" Set appearance
call defx#custom#option('_', {
      \ 'winwidth': 30,
      \ 'split': 'vertical',
      \ 'direction': 'topleft',
      \ 'show_ignored_files': 0,
      \ 'buffer_name': 'defxplorer',
      \ 'toggle': 1,
      \ 'columns': 'icon:indent:icons:filename',
      \ 'resume': 1,
      \ })
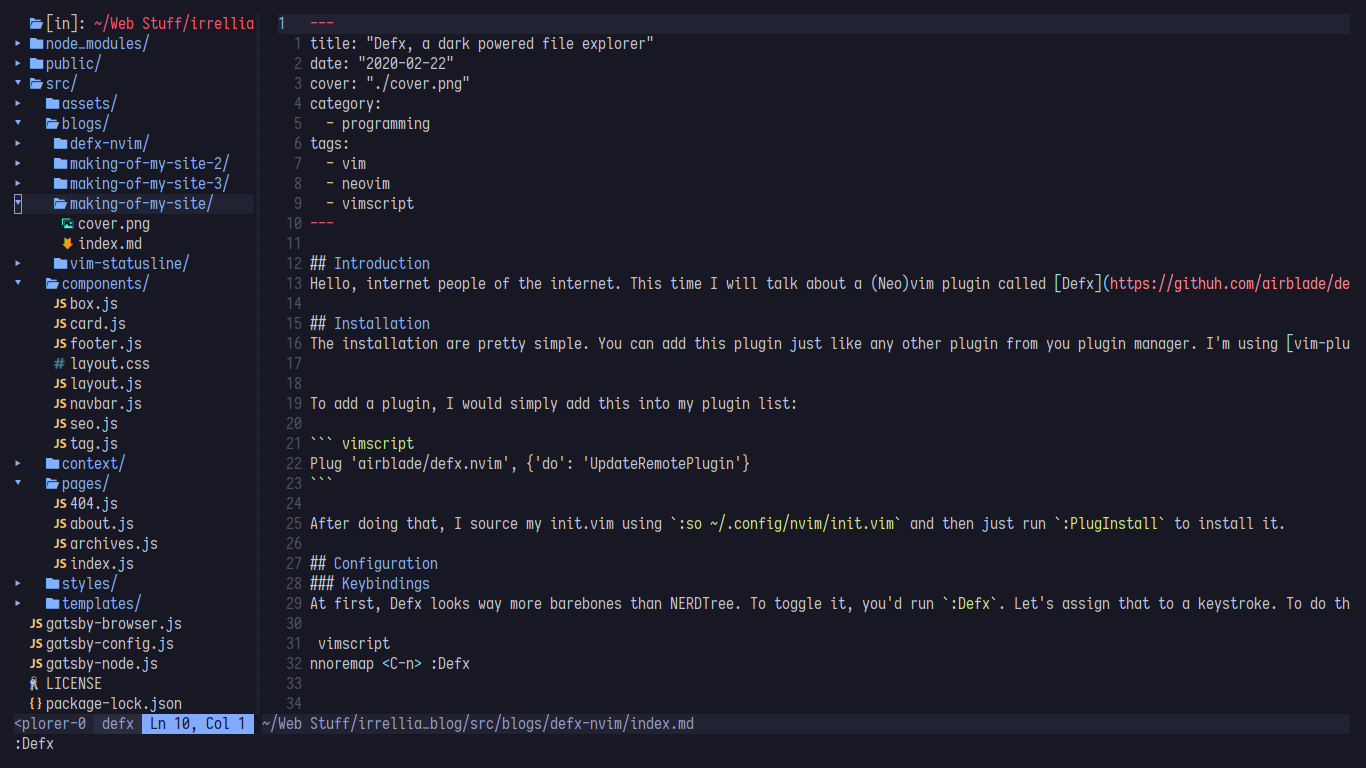
There we have it, people. We just transformed Defx to look like most IDE/Text Editor file explorer. Let's compare it side by side.


Conclusion
I think Defx is a good alternative to NERDTree and is worth to try. Some people said that it's faster and lighter than NERDTree, but it's not that significant in my experience. Anyway, let's end this post here. If you get confused, feel free to hit me up! That's it, see ya next time :)
vimneovimvimscript