Using github actions for SSG deployment
Posted on Saturday, 01 August 2020
3 minutes to read
Introduction
Previously, I use Travis CI to automatically deploy my site so if I push an update to my repo it will trigger a build and deploy it to github page. Turns out, github has a built in feature for CI/CD called Github Actions. In this post, I'll tell you how my experience using it.
Initial Setup
Removing Travis CI
Because my previous site is using Travis CI, I need to delete the old travis.yml. If you haven't use any CI/CD before then just skip this step.
Setting up Github Action
To get started, you will need a file called whatever you want inside .github/worksflows/ on your root project, I call it main.yml. You can also go to Actions tab on your repo and you'll find a bunch of preset that github gives you which you can then modify according to your wish.
Configuration
File configuration
The yaml file is pretty simple, here's mine and I'll explain it briefly each part.
name: Build and deploy

on:
  push:
    branches: master

jobs:
  build-and-deploy:
    runs-on: ubuntu-latest
    steps:
    - uses: actions/checkout@v2

    - name: setup node
      uses: actions/setup-node@v2-beta
      with:
        node-version: '12.x'

    - name: install deps
      run: npm install --production

    - name: build site
      run: npm run build

    - name: deploy site
      uses: peaceiris/actions-gh-pages@v3
      with:
        github_token: ${{ secrets.GITHUB_TOKEN }}
publish_dir: ./public-
name
Fill this field with whatever you want, it is used as a name for your action that will show up on github.
-
on:[action]:[branch]
This field is to tell github what action will trigger the github action. For example, I use
pushwhich will trigger github action if I did a push onmasterbranch. -
jobs
This field will be filled with jobs or commands that github action will do based on previous field.
-
build
This is the job name, fill it with whatever you want. In my case, I fill it with
build-and-deploy -
runs-on
This field specify on which platform the action will run. I fill it with
ubuntu-latest. -
steps
The steps for your action will go here. There are few steps before deploying my site such as setting up node, installing dependencies, building the site, and then deploy it to github pages.
- name
Fill this with the name of your step,
setup nodefor example. - run This is where you define a command to run
- uses If you use an external action, fill this in. It's available here
- with
This is used to pass any additional data such as
node-version,GITHUB_TOKEN, etc.
- name
Fill this with the name of your step,
Those are my brief explanation and how I understand each fields. If you want more details, please visit this documentation.
See it in action
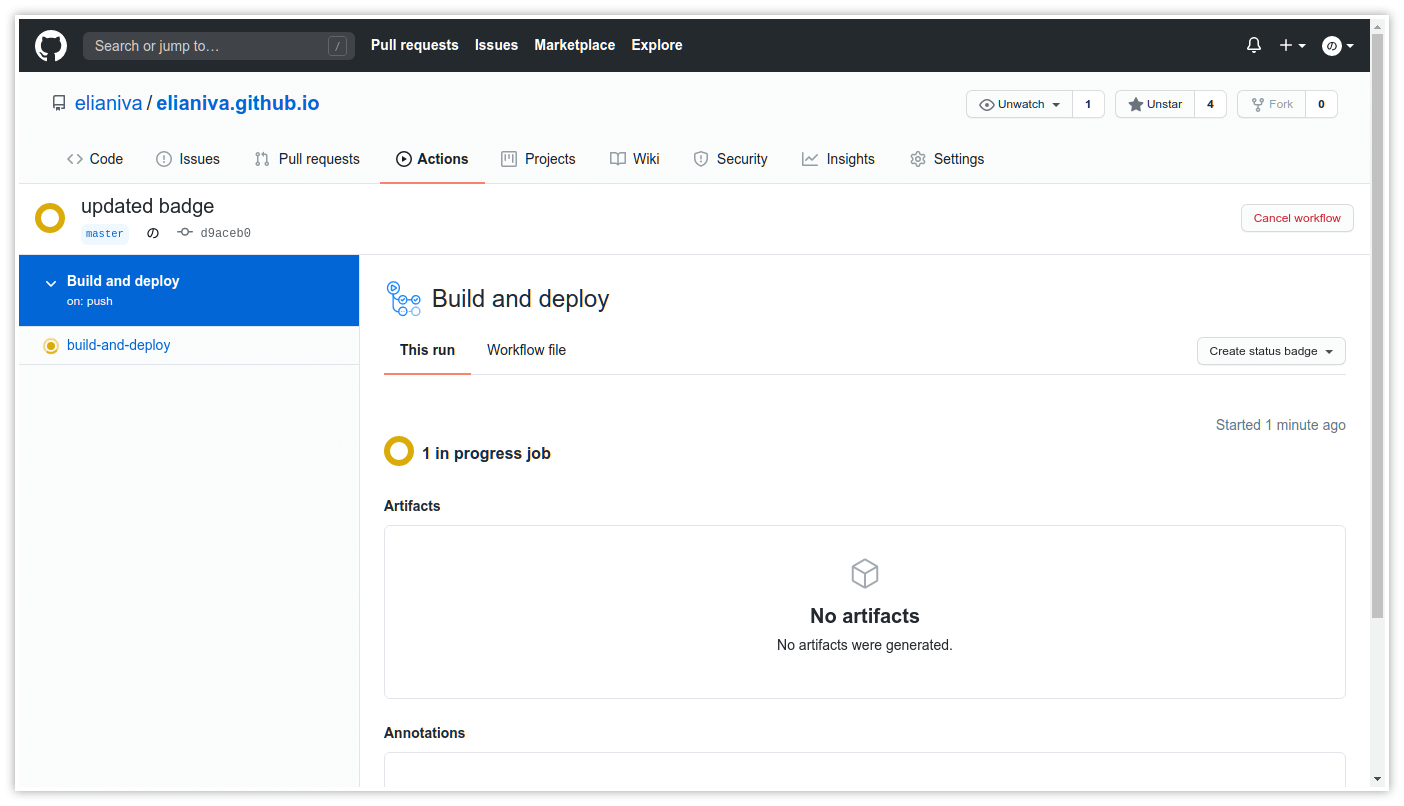
We've set up the config file, time to see it in action. Push the config file to the remote repo and go to github action tab.

If we click one of the action from the list, it will go to its own page which will look like this.
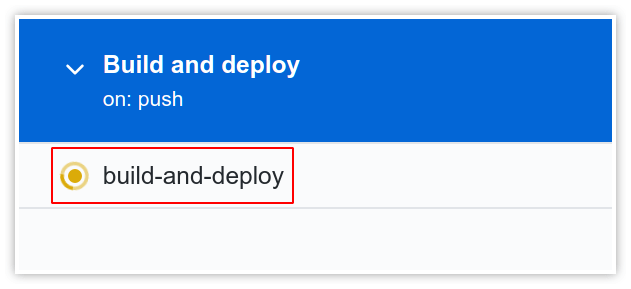
Our action name will show up here. Try to click on that.
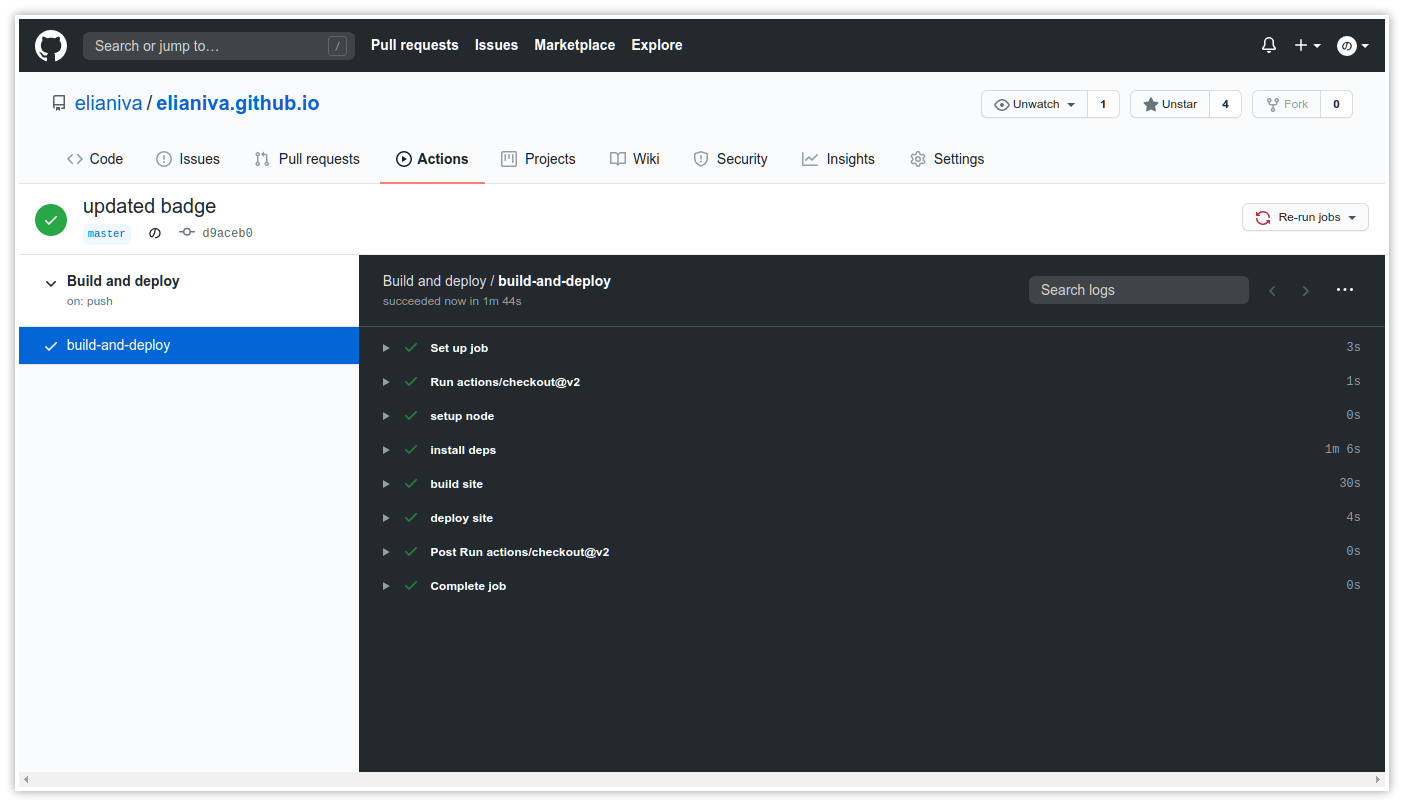
It will show this. The log of our action's jobs.
Conclusion
The reason why I moved from Travis CI is not because Travis CI is bad or anything. It's just I want to try a new thing, plus it's available on the same site that my repo is hosted. I can just visit one site to check on my repo or my build status.
Not gonna lie, I messed up the first time I did this lol. I messed up the config file (mainly because wrong indentation) and I messed up my repo branch because I had to move my source branch to master branch and I did it in an overcomplicated way.
website